XpertCapture Lite User Manual
This document is out of date. Latest version may have differences in different ways. Please contact with us for latest user mannual.
Steps
1. Download
2. Registration
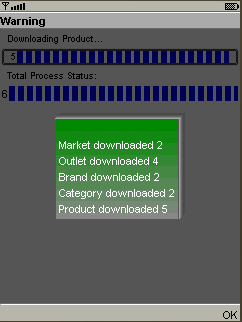
3. Basic Data Sync
4. Start operation using CheckIn(Order Capture) or DCR
5. Send Data
6. Check the Report on Mobile and Web Portal
Download
To download XpertCature Lite, go to the following link from your mobile browser:
XpertCapture Lite (http://xpertcapture.com/download)Registration
After successful installation of the XpertCapture Lite, run it. For first time login, XpertCapture Lite will open the Registration page.

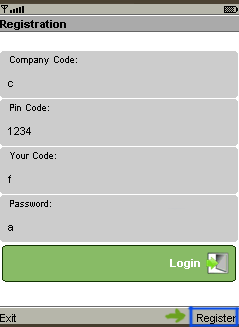
Company Code:
Every company has a unique company code provided by XpertCapture after registration as a company. Enter the company code that was provided by your Company administrator.
Pincode:
It is a secret code and will be provided by the Company Admin. XpertCapture create this secret Pincode for each sales force or XpertCapture Lite user.
Your Code:
Your code refers to the FieldForce Code. Your company Admin will provide you this code. All the activities using the XpertCapture Lite will be tracked with this code.
Password:
Enter your desired password that you will use every times to login to XpertCapture Lite later on.
After entering all the information, click on the Register button. XpertCapture Lite will request for internet access permission. Allowed it for always. After getting the permission, XpertCapture Lite will register you with the system after validating the Combination of Company Code, Pincode and Your code.
XpertCapture Menu
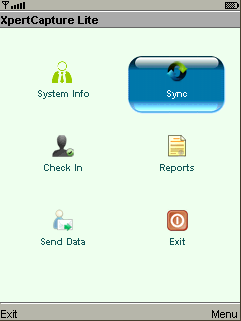
System Info
It shows the System Information like basic configuration
Sync
It syncs the XpertCapture Lite with XpertCapture core system. Basically it sends the Transactions and CheckIn Histories to Server and receive the changed basic data from the server.
Check In
It is the core of XpertCapture Lite. The capturing operation will be done by this option. Basically when a FieldForce visits a customer, outlet or a retailer, a CheckIn log event will be created and when he will leave, the CheckOut log event will be created. It will help the FieldForce as well as the company to track the FieldForce's movements, his visit histories and this data will help them to increase the effeciency in distribution system.
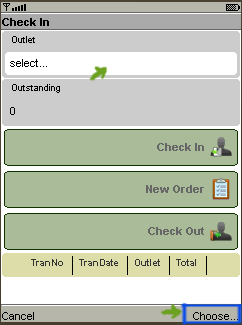
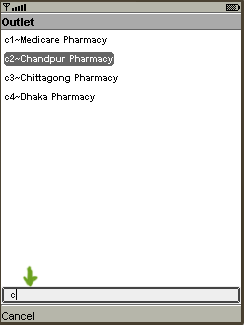
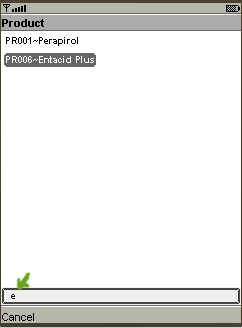
XpertCapture Lite provides a super search facility to pick a customer or outlet or a retailer. User can search them by inputing any part of Code or name.
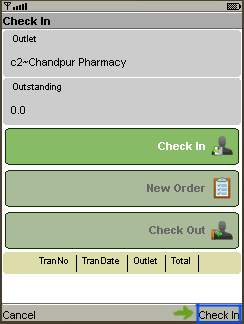
After selecting a customer/retailer/outlet, system will enable the CheckIn button to check in. If user don't want to check in, he can cancel the process by pressing the Cancel button.
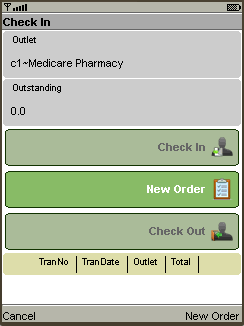
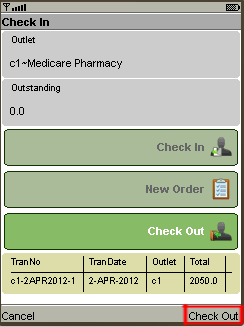
After checking in a customer/outlet/retailer, system will offer to create a new order by switching to New Order button. User can create a order by pressing on New Order button or he can check out without creating an order by pressing the checkout button. If user check out without creating an order, system will create CheckIn and CheckOut log where it will mark that there are no order created in this event.
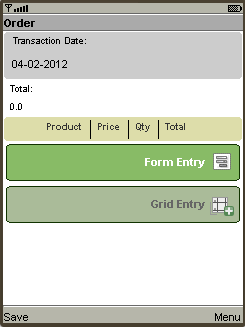
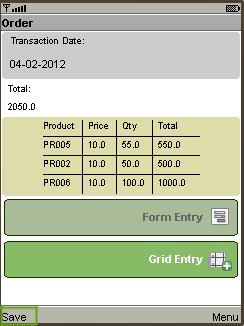
If user click on the New Order button, system will open the Order Form. On the order form, user will get following entry field:
OrderDate/TransactionDate: By default it is current system date of the device. It can be change if the Company Admin set it changeable in System configuration to allow back dated data entry.
OrderType/TransactionType: It is optional and based on company Admin setup. For a Sale oriented company, the options will be ‘Sales’ and ‘Return’.
DeliveryDate: Optional and based on company Admin setup. It is the date of estimated or targeted product delivery.
DeliveryShift: Optional and based on company Admin setup. It is the shift of estimated or targeted product delivery. By default, the values will be Morning and Evening.
PaymentMode: Mode of Payment, optional and based on company Admin setup. By Default options are Cash, Credit or Card.
Payment Desc. : It is the description of payment. Users will entry the card number if the payment is done by Card or he may enter credit payment details.
OrderDesc./Transaction Desc. : It is optional based on company set. It is basically useful to put comments on transaction.
There are two ways to entry the order items in XpertCapture Lite.
Form based data Entry: In this format, user will pick a product from super search picker where he can search by any part of product code or name. After picking product, Quantity filed will be focused. User will enter the quantity and click on the Add button to add the entry in table. After adding an order item, system will automatically refocused on product picker to make faster data entry.
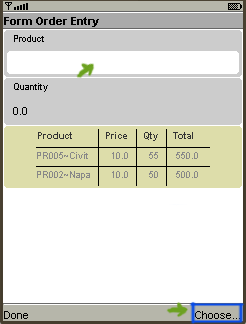
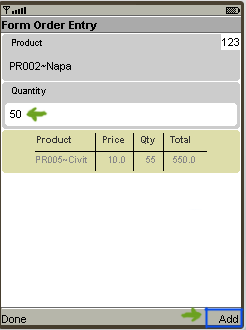
After adding all items, click on Done button. It will back you to the order form.
Grid based data Entry: It is a excel sheet like grid with super search product picker.
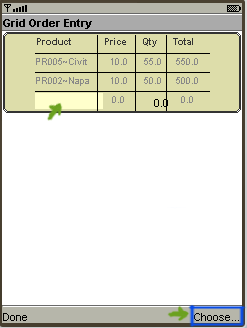
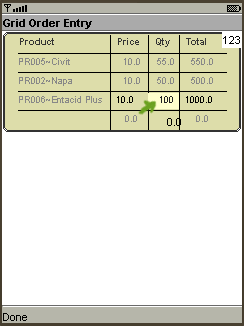
After adding all items, when user click on Done button, it backs to the order form. On the form, system will show all the items and total price. On the Order Form, press the Save button to save the Order.
After saving an order, system will redirect to the CheckIn form. To check out user will click on CheckOut button.
Doctor Call Report(DCR)
Doctor Call Report(DCR) is only for Pharmaceuticals company. Using DCR, a pharmaceutical company can easily monitor the performace of its doctor calls. XpertCapture provides an easy and effective DCR data capturing system. It collects the adject time of call in and out and products of report and gift items. With these information, XpertCapture provides Doctor vs Order performance reports in where it shows the flow of DCR vs Order amount.

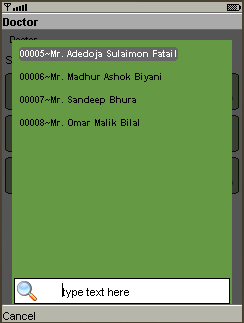
Select a doctor from the doctor list. Use the powerfull search option to find out the desired doctor.
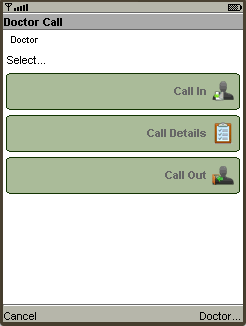
After selecting a doctor, press on the 'Call In' button and go to the doctor for calling. Don't leave the Call Details Page.
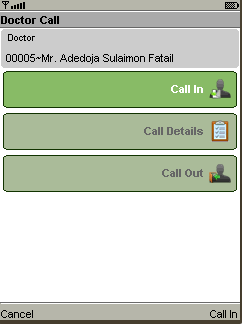
After leaving the doctor room, complete the call details.
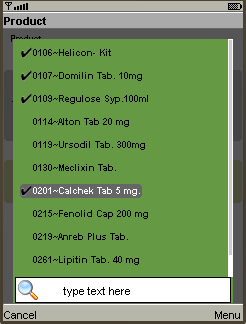
Select the products from the DCR product list. You can select one to many products.
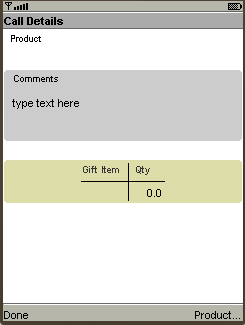

After adding the call products, add the comment about the call.
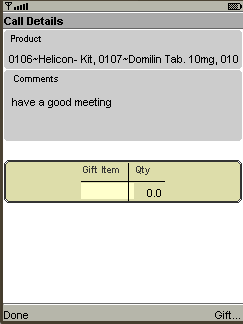
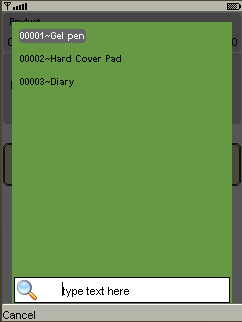
Entry the gift items that you provided the doctor during the call
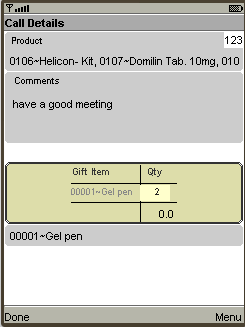
If the call details entry is done then click on the 'Done' button. System will back you to Call Out page.
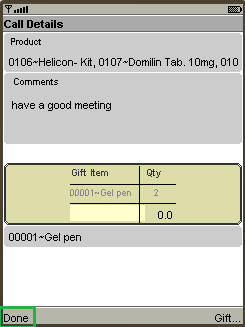
You can edit the call details anytime before pressing the 'Call Out'.
If you think the entry is done, then press the 'Call Out' button.
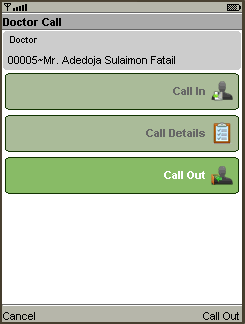
Remember XpertCapture will calculate the Call Duration from the time difference between 'Call In' and 'Call Out'.
Reports
All the reports will be found under this menu. The following reports are reside under this menu
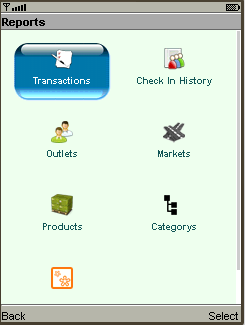
Transactions: Shows all the transactions done in a specified date. User can look at transactions for different date by set it on date field.
CheckIn Histories: Shows all the CheckIn and CheckOut histories for a specified date. User can look at histories for different date by set it on date field.
Outlets: Shows all the Outlets that are served by this XpertCapture Lite User. The label Outlets may vary based on the Company Admin's setup. It can be Customers or Retailers or any other term that is used by a company.
Markets: Shows all the Markets that are served by this XpertCapture Lite User. The label Markets may vary based on the Company Admin's setup. It can be Route or any other term that is used by a company.
Products: Shows all the products that are served by this XpertCapture Lite User. The label Product may vary company wise. It can be SKU, Item or any other term that is used by a company.
Categories: List all the Categories of product. Category is optional feature based on company product structure.
Brands: List all the Product brands. It is also and optional feature based on company product structure.
Send Data
This menu is a option to send transaction and checkin history data to server. It only send data to server.
Exit
It is used to exit or shutdown the XpertCapture Lite System